Dyeing Eggs Naturally – What I Learned As A Newbie
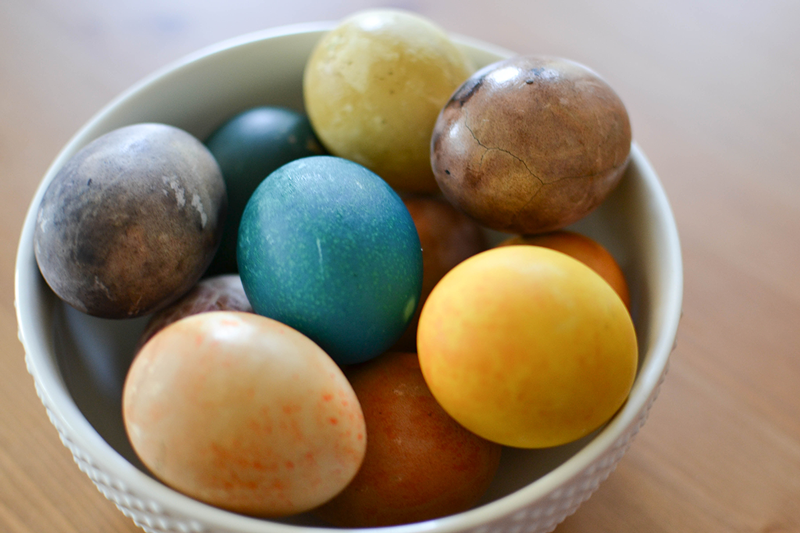
I’m sure like me, you’ve seen the many recipes for dyeing eggs naturally floating around Pinterest and Facebook. Dyeing eggs with natural ingredients is something that has intrigued me for a while, but this is the first year I actually made the leap and tried it out. And while I didn’t get the spectacular results you often see in the photos accompanying those recipes, I did make some pretty eggs, have some fun and learned a few things along the way.
- It’s not as expensive as you might think. The dye kits they sell in big box retailers are only $5, but you get a bunch of toxic dyes with it. Not worth it in my opinion. I was willing to pay the price to skip the red dye, etc. Turns out all my ingredients, including 2 dozen eggs, were only about $16. Not bad, right?
- You may offend family members with the process. My husband was less than thrilled with the entire house smelling like cabbage, spinach and turmeric and slightly annoyed when I took the refrigerator over with mason jars of dye and eggs.
- Speaking of the process, it’s a long one. There’s boiling, straining, cooling and that’s all before you even get to dye the eggs. Personally, I found it fun in sort of a science experiment kind of way, but it may not be great for small kids—bring them in at the end when the dye is ready. Older kids may love experimenting with different ingredients—seeing which ones work and which ones don’t (red cabbage is a mind blower).
- Practice makes perfect, I hope. Some of my eggs were a bit of a disappointment—I had trouble getting all the colors I wanted but this just makes me want to try again! I’m not saying that what I ended up with wasn’t beautiful—some of the imperfections were naturally gorgeous. But I had a hard time creating certain colors. Pink/maroon was particularly elusive for me, I want to find out what I did wrong!
- The longer you soak the eggs in the dye, the higher the chance is that the flavor of the dye will transfer to the egg. This could be good or bad, depending on your tastes. I’ve tried three (berry beet and spinach) “flavors” so far and the only one I could taste a change in was spinach.
- My favorite (ones that worked best) dye ingredients were: Red cabbage, turmeric and berry.
 The details:
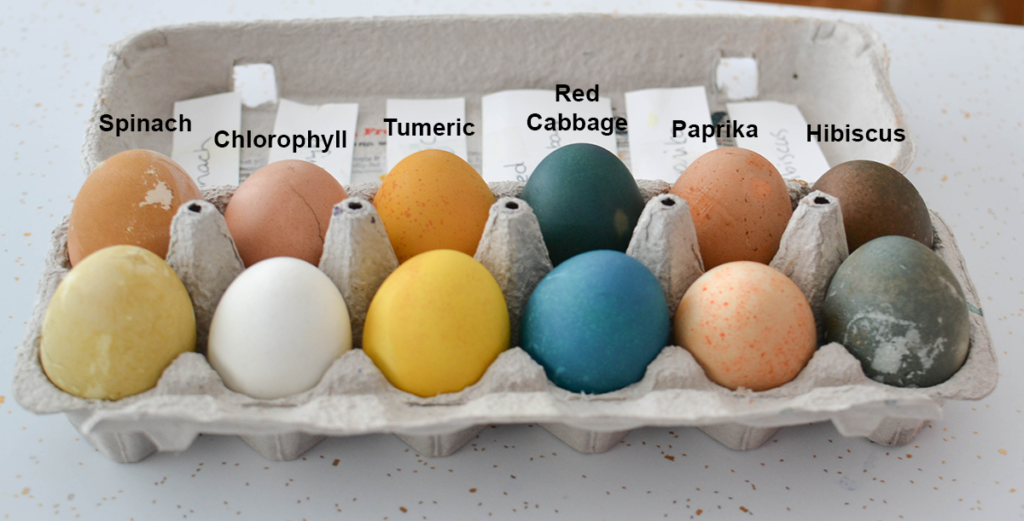
I used both white and brown eggs—brown produces a darker more muted color. For my mordant I chose vinegar. You may use cream of tartar instead. My dye ingredients were:
- Beets – 1 bunch, washed and sliced = pink
- Spinach – 1 bunch, chopped = pale green
- Tumeric – 2-3 tbsp powdered spice = gold
- Red Cabbage – ½ large cabbage, sliced = turquoise
- Hibiscus flowers – 2-3 tbsp = lt gray violet
- Paprika – 2 tbsp powdered spice = orange
- Chlorophyll – 2 tsp powder = nothing. I’ve since read that using liquid chlorophyll is the way to go. Just paint it on with your fingers and you have a beautiful green egg. It’s on my list for next year.
- Blackberries and Raspberries – 1 cup frozen = violet
To make each batch of dye, boil:
- Dyestuff
- 4 cups of water
- 2 tbsp of vinegar
Simmer for 30-60 minutes – until your dye reaches your desired shade. Strain out dye ingredient (if possible) and let cool. I transferred my dye into glass jars and placed a hard boiled white and brown egg into each jar (so I could see how each color affected the different egg types). Then I placed the jars in my refrigerator overnight. In the morning, I fished out the eggs, gave them a quick water rinse and let them dry off before storing them in the fridge.